Part 1 – Install Jenkins with Docker
Starting Jenkins on container
Jenkins CI/CD Series
This Part 1 base requirement for rest of the series parts
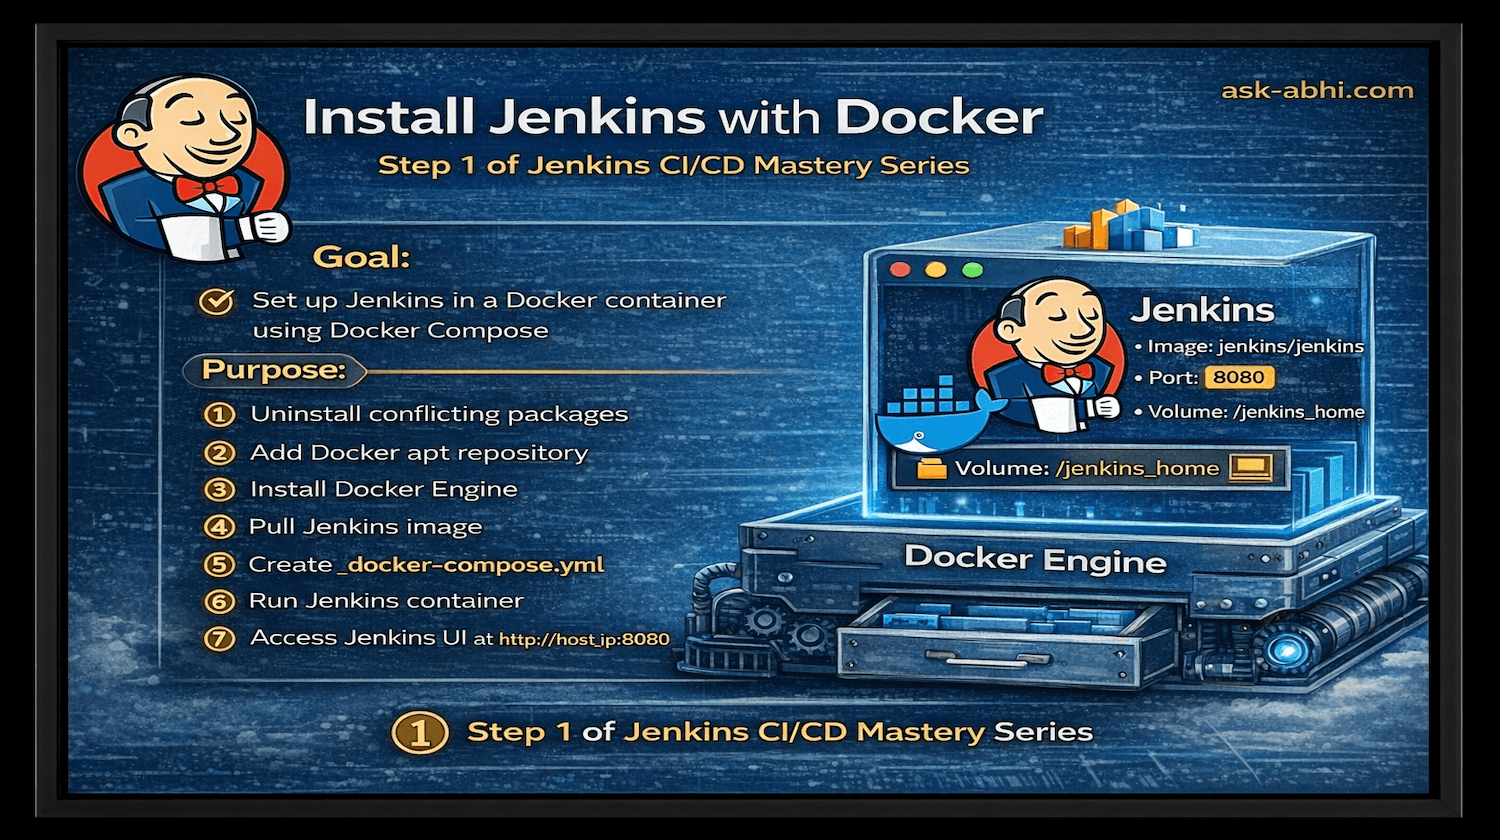
Goal
The goal of this project is to install Jenkins using Docker and create a fully functional Jenkins environment that can be used for building CI/CD pipelines. By the end of this exercise, Jenkins will be running inside a Docker container and accessible through a web browser.
This setup provides a clean and reproducible environment for Jenkins, making it easy to deploy, manage, and upgrade without directly installing Jenkins on the host operating system.
Purpose
The purpose of this exercise is to introduce the foundation of Jenkins-based CI/CD environments by containerizing Jenkins using Docker. Running Jenkins inside a container ensures portability, easier management, and better isolation from the host system.
This approach is widely used in modern DevOps environments because it allows teams to quickly spin up Jenkins instances, maintain persistent data using volumes, and scale automation infrastructure efficiently.
Through this project, we will:
Install Docker and configure the Docker repository
Pull the official Jenkins image from Docker Hub
Deploy Jenkins using Docker Compose
Configure persistent storage for Jenkins data
Access the Jenkins web interface and complete the initial setup
This forms the starting point for the Jenkins CI/CD Mastery series, where the Jenkins instance created in this step will be used for building pipelines, automating tasks, and integrating with other tools in later projects.
Prerequisites
Prepare Host Linux machine locally on Windows/Mac (Refer), or on any Cloud
Pro-Tip: Recommended on AWS:EC2, Stop the EC2 instance whenever finish the task
Step-by-Step Implementation
Run the following command to uninstall all conflicting packages in case you are using any existing Linux system
sudo apt remove $(dpkg --get-selections docker.io docker-compose docker-compose-v2 docker-doc podman-docker containerd runc | cut -f1)
Install using the apt repository
Before you install Docker Engine for the first time on a new host machine, you need to set up the Docker apt repository. Afterward, you can install and update Docker from the repository.
- Set up Docker's
aptrepository.
Add Docker's official GPG key:
sudo apt update
sudo apt install ca-certificates curl sudo install -m 0755 -d /etc/apt/keyrings sudo curl -fsSL https://download.docker.com/linux/ubuntu/gpg -o /etc/apt/keyrings/docker.asc sudo chmod a+r /etc/apt/keyrings/docker.asc
Add the repository to Apt sources:
sudo tee /etc/apt/sources.list.d/docker.sources <<EOF Types: deb URIs: https://download.docker.com/linux/ubuntu Suites: \((. /etc/os-release && echo "\){UBUNTU_CODENAME:-$VERSION_CODENAME}") Components: stable Signed-By: /etc/apt/keyrings/docker.asc EOF
sudo apt update
Install the Docker packages.
To install the latest version, run:
sudo apt install docker-ce docker-ce-cli containerd.io docker-buildx-plugin docker-compose-plugin
Note
The Docker service starts automatically after installation. To verify that Docker is running, use:
sudo systemctl status docker

Some systems may have this behavior disabled and will require a manual start:
sudo systemctl start docker
Download Jenkins Image
It will have all the required configurations
sudo docker pull jenkins/jenkins

- Navigating/creating folder structure
home/jenkins/jenkins_home#
Create docker-compose.yml
services:
  jenkins:
    container_name: jenkins
    image: jenkins/jenkins
    ports:
      - "8080:8080"
    volumes:
      - $PWD/jenkins_home:/var/jenkins_home
    networks:
      - net
networks:
  net:
- Create another folder that is mentioned in the YAML above
home/jenkins/jenkins_home
Give the permissions
sudo chown 1000:1000 jenkins_home -R
docker compose up -d
docker ps
Note - Alwasy run docker compose from directory where docker-compose.yml resides

Pro Tips - Check the logs.
docker logs -f jenkins
- Access by using "host_IP:8080."

- The password will be stored at
/var/jenkins_home/secrets/initialAdminPassword
Install Suggested Plugins

- Create an admin user and go to the Home page

Done!!!
Conclusion:
In this first part of the Jenkins CI/CD Mastery Series, we successfully set up Jenkins using Docker, providing a clean and portable environment for running Jenkins without installing it directly on the host operating system. By containerizing Jenkins, we ensured that the setup is easy to manage, reproducible, and scalable for future CI/CD workloads.
We installed Docker, configured the Docker repository, pulled the official Jenkins image, and deployed Jenkins using Docker Compose with persistent storage. Finally, we accessed the Jenkins web interface and completed the initial setup by installing the suggested plugins and creating the administrator account.
This Jenkins instance will serve as the foundation for the rest of the series, where we will build real-world automation and CI/CD workflows.
In the next part, we will extend this environment by creating an SSH-enabled remote server container and integrating it with Jenkins. This will allow Jenkins to execute commands on remote systems — a key capability used in many DevOps automation pipelines.
🔗 Continue the Series
⬅️ Previous Article: Home
➡️ Next Article: Part 2 Creating Your First Jenkins Pipeline
⭐ If you found this article useful, follow https://ask-abhi.com for more DevOps tutorials.